728x90
사용이유 : 코드의 재사용 쉬움 (우리의 입맛대로 만들 수 있음)
그냥 함수를 하나 만듦
1. 원하는 이름 짓기
2. 원하는 기능을 함수 안에 구현 해주면 된다.
(매개변수와 리턴 값도 마음대로 정할 수 있다)
** 컴포넌트 내부에 있던 로직을 커스텀 훅이라는 함수로 빼주는 역할을 한다!
+ 커스텀 훅 안에서 다른 React Hook들을 자유롭게 사용할 수 있다는 장점도 있다!
+ 커스텀 훅을 사용하는 컴포넌트마다 커스텀 훅이 가지는 state와 effect는 완전히 독립적인이기 때문에 재사용성이 아주 큼!!!
이름을 마음대로 지어도 되지만, 커스텀 훅 도 React의 hook 이므로 'use' 라는 키워드를 사용해야함
=> 실수를 하더라도 리엑트 자체에서 콘솔에 경고를 잘 띄워줌 (오류 방지용)
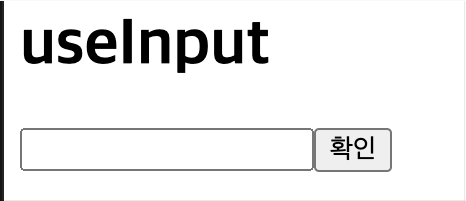
1. useInput
App.js

import "./styles.css";
import React, {useState} from "react";
import { useInput } from "./useInput";

const App = () => {
 const [inputValue, setInputValue] = useState(initialValue);

  const handleChange = (e) => {
    setInputValue(e.target.value);
  };


  const handleSubmit = () => {
    alert(inputValue);
    // setInputValue("");
  };

  return (
    <div>
      <h1>useInput</h1>
      <input value={inputValue} onChange={handleChange} />
      <button onClick={handleSubmit}>확인</button>
    </div>
  );
};

export default App;
원래 기존에 하던 방법 : 다른 컴포넌트에서 input을 또 쓸때 위 같은 코드를 복붙해야함 = 복잡,조잡 😤
useInput.js

//useInput 매개변수로 useInput에 들어갈 초기값을 넣어줌
export function useInput(initialValue) {
  const [inputValue, setInputValue] = useState(initialValue);

  const handleChange = (e) => {
    setInputValue(e.target.value);
  };
  return [inputValue, handleChange];
  //return 값도 원하는대로 만들어 줄 수 있음.
  //배열로 먼저 함. 그리고, input값을 갖고있을 inputValue와 handleChange 함수를 넣어줌
useInput.js 파일을 따로 만들고 useInput 함수를 넣어준다.
이때, useInput 매개변수로 useInput 에 들어갈 초기값을 넣어주고,
return 에는 input값을 갖고있을 inputValue 와 handleChange 함수를 넣어줬다.
위처럼 useState 라는 hook을 useInput hook 안에서 사용할 수 있었다!!!
import "./styles.css";
import React from "react";
import { useInput } from "./useInput";

const App = () => {
  const [inputValue, handleChange] = useInput("하이");
  //지금 만든 useInput이 return 값으로 배열[inputValue, handleChange]을 받으므로,
  //리턴값에 맞춰서 위처럼 넣어줌.

  const handleSubmit = () => {
    alert(inputValue);
    // setInputValue("");
  };

  return (
    <div>
      <h1>useInput</h1>
      <input value={inputValue} onChange={handleChange} />
      <button onClick={handleSubmit}>확인</button>
    </div>
  );
};

export default App;
그리고 useInput을 사용한 App.js 컴포넌트 이다.
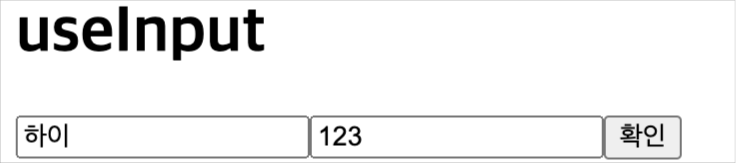
만약, 다른 인풋창이 더 필요하다면??
 const [inputValue2, handleChange2] = useInput("123");
 //이렇게 하나 더 선언한 후 !

return (
    <div>
      <h1>useInput</h1>
      <input value={inputValue} onChange={handleChange} />
      <input value={inputValue2} onChange={handleChange2} />
      //이렇게 대입해 준다 !!
      <button onClick={handleSubmit}>확인</button>
    </div>
  );
이제, handleSubmit도 똑같이 재사용 가능하게 바꿔주겠다
App.js

import "./styles.css";
import React from "react";
import { useInput } from "./useInput";

function displayMessage(message) {
  alert(message);
}
//2. displayMessage를 만들고, useInput.js로 가서

const App = () => {
  const [inputValue, handleChange, handleSubmit] = useInput("", displayMessage);
  //1. useInput의 두번째 인자로, 확인 버튼을 눌렀을때 불려질 함수를 담아준다. (컴포넌트 밖에 만듦)

  return (
    <div>
      <h1>useInput</h1>
      <input value={inputValue} onChange={handleChange} />
      <button onClick={handleSubmit}>확인</button>
    </div>
  );
};

export default App;
useInput.js

import { useState } from "react";

//두번째 매개변수에도 넣어준다.
export function useInput(initialValue, submitAction) {
  const [inputValue, setInputValue] = useState(initialValue);

  const handleChange = (e) => {
    setInputValue(e.target.value);
  };

  const handleSubmit = () => {
    setInputValue("");
    submitAction(inputValue);
  };
  //setInputValue를 다시 초기화 시키는 로직과함께 submitAction(inputValue)함수를 넣어준다.

  return [inputValue, handleChange, handleSubmit];
}
import "./styles.css";
import React from "react";
import { useInput } from "./useInput";
function displayMessage(message) {
alert(message);
}
const App = () => {
const [inputValue, handleChange, handleSubmit] = useInput("", displayMessage);
//그리고 두번째 인자로 넣어준다.
return (
<div>
<h1>useInput</h1>
<input value={inputValue} onChange={handleChange} />
<button onClick={handleSubmit}>확인</button>
</div>
);
};
export default App;
728x90
'프론트앤드 > [React]' 카테고리의 다른 글
| [React] Redux (0) | 2023.07.02 |
|---|---|
| [React] 디자인 패턴 (MVC, Flux) (0) | 2023.07.01 |
| [React] React.js로 전화걸기 링크 제공 하기 (0) | 2023.04.22 |
| [React] input 으로 프로필 이미지 업로드 하기 (0) | 2023.04.20 |
| [React] 인터넷 연결확인 모달 + 컴포넌트 종료(?) 나가기 (0) | 2023.04.05 |